ITA Platform Migration
Go Live. How to move an existing legacy Ripe account to the ITA Platform.
If you're a legacy Ripe account (joined Ripe prior to March 31, 2025) you are likely on our prior-generation platform. This article outlines the simple process to move to our new ITA Platform. The ITA Platform is the new standard for Ripe and will be the only platform supported in the future, all clients must move to the new ITA Platform. Think of it as a significant upgrade based on thousands of pieces of feedback but with no change in your cost or pricing.
For clients/accounts that joined Ripe after 3/31/25 you will likely go live on our new ITA Platform from day one, so no need to read any further. If aren't sure where you land check with your Ripe account manager.
The Ripe ITA Platform maintains existing functionality but is better setup to reach your goals of owning the traveler experience, supporting your suppliers and improves onsite conversion.
If you aren't sure which platform you are on, the quickest way to tell is by the property listing design. Legacy has longer/horizontal property listing that span the page. The all new ITA platform has taller tiles and an interactive map, oh and loads over twice as fast, among many of other improvements.
Legacy Platform
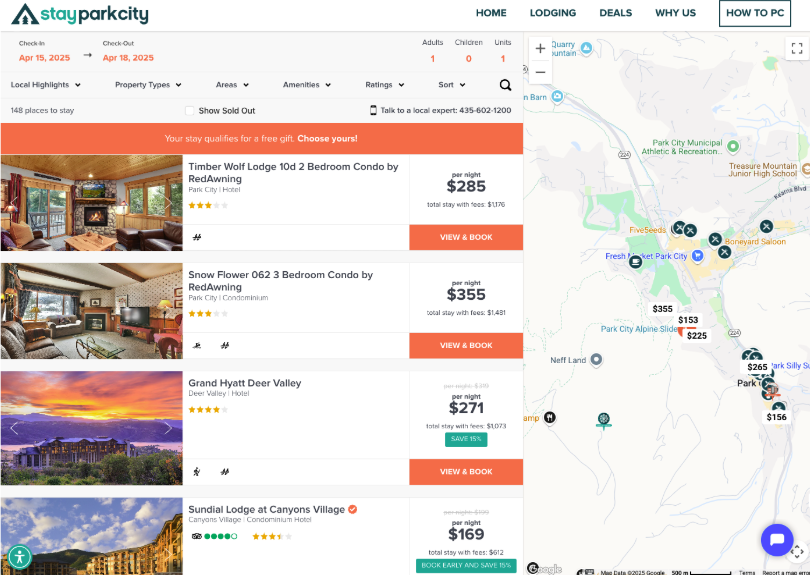
ITA Platform

There will be brief downtime during the switch, typically around 60 seconds or less.
- Your existing Ripe Search Widget fromwebsite will continue to work. Stay tuned for an all new widget with expanded functionality in the future.
- All existing landing pages will continue to work
- All existing affiliates will continue to work
Go Live
Once Ripe completes the configuration, the client/account holder will be given a preview how how their site looks and functions on the new platform. When the client is ready and gives the go-ahead, there are just a few quick actions required by the client/IT team and then you're live.
Step One
Ripe will generate unique (private) CNAME records. These have a 48 hour expiration from the moment they are generated. With this in mind, they should only be generated as soon as the client is ready to update their CNAME records on their hosting platform.
Step Two
The Ripe account manager will share the CNAME records with the client.
Step Three
The client will need access to their website host provider. This is the provider used for their primary website, of which the Ripe platform is a sub-domain of.
Towards the bottom of this page we have included links for the most popular providers and how to update DNS records:
How to update your records and go live
- Remove
whitelabel.rootrez.comfrom your DNS entries. - Add the new, unique CNAME records exactly as they were shared with you. Note you must add ALL CNAME records.
- Set a Time to Live (TTL) of 1 minute, or the lowest time listed. This value sets the amount of time it takes for the records to be referenced again, so a shorter window means a quicker update. The downtime, if any, during the migration should only be about 60 seconds, but time can vary based on hosting provider.
DNS Entry Update for new CNAME Records
Type: CNAME
Host:
Target:
Proxy: Off
TTL: 1 Minute
Domain Validation
Once all CNAMEs have been added save your changes. This starts the process, and within about a minute (based on your TTL value) you will start to see the new site live. All primary URLs are backwards compatible and should continue to work.
CNAME Setup Reference Links
Visit your hosting providers website, login and find your domain registration.
Updated 11 months ago